 |
Freeserve Easy Guides |
|
 |
Outlook Express 4 |

 |
Step 3: |
 |
Checking your mail settings. |
 A. Check your mail settings
 B. Adding a new mail account
 C. Reading and sending mail
 D. Check your news settings
 A. Check your mail settings.
It is essential that email settings are correct when sending mail. Installing the Freeserve software should automatically set up
an email account for you.
To check that the details for an existing email account are correct follow the steps below.
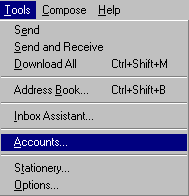
1. Select 'Tools', then 'Accounts' from the Outlook Express menu bar.
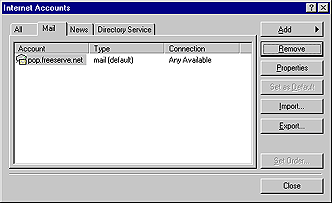
2. Highlight the appropriate account (which will ususally be lsited as 'pop.freeserve.net')
by clicking on it with your mouse, then select 'Properties'.
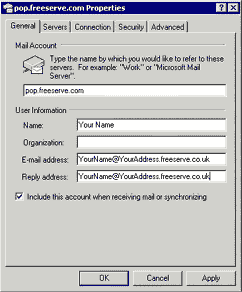
3. From the Properties box, click on the 'General' tab at the top. Make sure that the name,
organisation, e-mail address, and reply to address that you want to appear on your e-mails is correct. The account is usually
labelled 'pop.freeserve.net', but this is not important.
4. Now click on the 'Server' tab at the top.
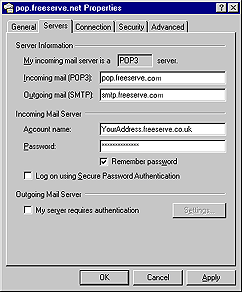
- The outgoing mail server (SMTP) should be set to smtp.freeserve.net
- The incoming mail server (POP) should be set to pop.freeserve.net
- In the 'Incoming Mail Server' section, 'Logon using' should be selected, and you should enter your username and password
in the boxes provided.
Your username and password were chosen when you set up your account with Freeserve. As a guide, if your e-mail address
was, for example, 'myname@myaddress.freeserve.co.uk', your username would be 'myaddress.freeserve.co.uk'. Your password is
case sensitive, so you must enter it exactly as it was entered when you set up your account. For instance, 'MyPaSswoRd' is
not the same as 'mypassword'.
- 'Logon using Secure Password Authentication' should not be selected.
- In the 'Outgoing mail' section, the 'My server requires authentication' option should not be selected.
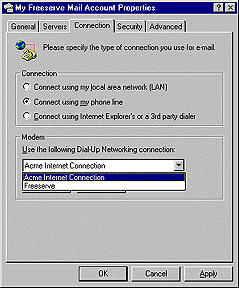
5. Now click on the 'Connection' tab at the top. Select 'Connect using my phone line', then select
your Freeserve connection from the menu underneath. This will ensure that Outlook Express will automatically dialup the correct
connection.
 B. Adding a new mail account.
1. Bring up your "Accounts" details.
- Do this by clicking once on the "Tools" menu, and select "Accounts".
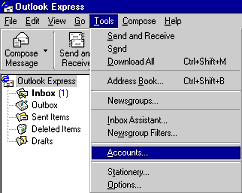
- You'll see a box looking like this. Click on the tab marked "Mail".
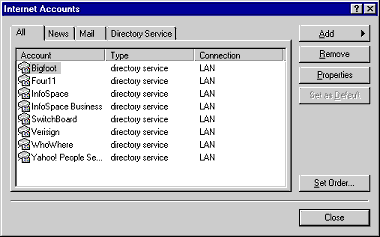
- The friendly name of your original e-mail account will now be visible.
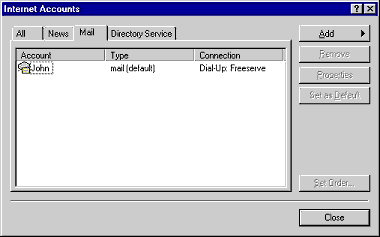
2. Add a new address
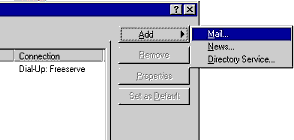
- Click on the "Add" button.
- Select "Mail".
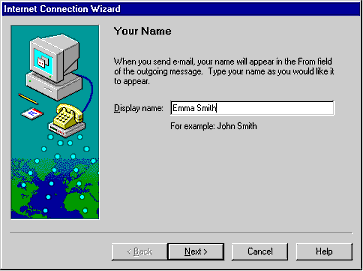
- Enter a name in the box to identify the user of the new mail account. e.g. Emma Smith.
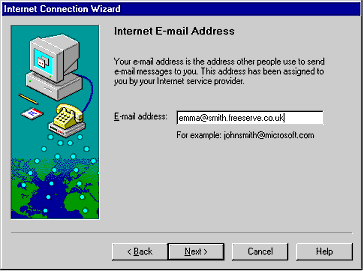
- Enter the e-mail address for the new user e.g. emma@smith.freeserve.co.uk.
- The first part of this address can be any combination of four to twenty-four letters and numbers (no spaces or
punctuation).
- The second part of the address (after the @ symbol) must use your account's normal internet address (i.e
smith.freeserve.co.uk).
Remember: For each Freeserve account, you can change only the part of the email address
before the @ symbol. Everything after the @ symbol must stay the same - including any
numbers that were included in your original address.
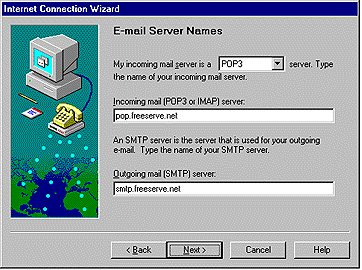
- Enter the e-mail server names.
- In the "Incoming mail" box, enter "pop.freeserve.net".
- In the "Outgoing mail" box, enter "smtp.freeserve.net".
Enter the POP account logon details.
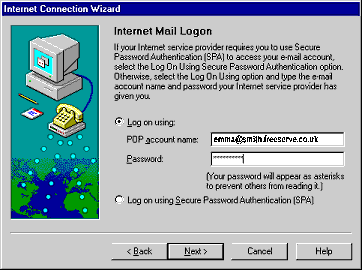
- In the "POP account name" box, enter the full name of the new address (in this example,
emma@smith.freeserve.co.uk).
- In the "Password" box, enter your normal password (created when you first signed up to Freeserve).
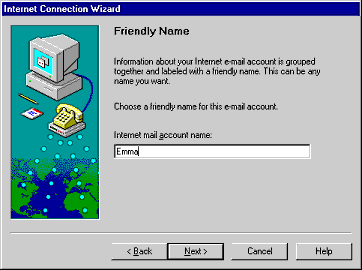
- Enter a name to identify this account on your computer. e.g. Emma.
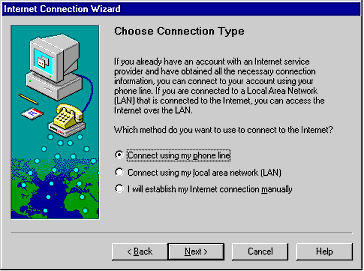
- Select "Connect using my phone line".
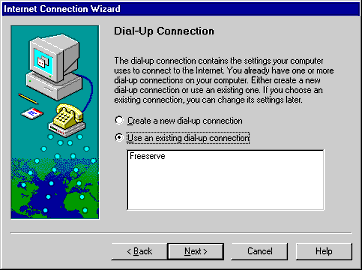
- Select to "Use an existing dial-up connection".
- Your Freeserve connection will be shown in the box underneath.
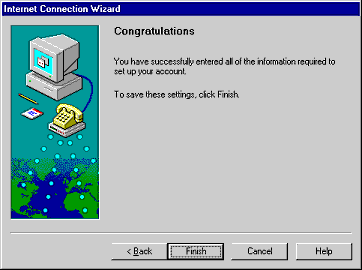
- Your new e-mail account is now created.
 C. Reading and sending mail.
1. Checking for new e-mail
- To read your e-mail you need to log in to Freeserve and check to see if you have new mail.
- If you've set up more than one address you can simultaneously check all e-mail addresses for new mail by clicking on the
"Send and Receive" button on the main toolbar.

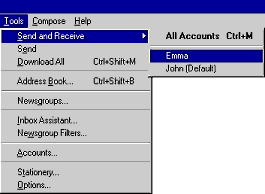
- If you want to check only one of your e-mail addresses, click once on "Tools" on the main menu and then select
"Send and Receive". A second menu will appear allowing you to chose which account to check.
2. Reading e-mail
- New mail messages will appear in the right hand window. To read a message, double click on it.
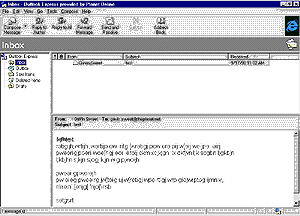
- All new mail will be placed automatically into the "Inbox".
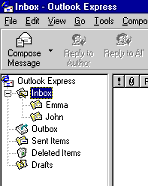
- You may find it useful to set up new folders within your inbox for each mail address. Do this using the "File"
menu - select "Folder", then "New Folder".
- You can "Drag and Drop" your messages into whichever folder you like.
3. Sending e-mail
- Type a message.
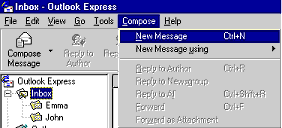
Open a "New Message" by clicking on the "Compose Message" button on the main Outlook Express toolbar.

You can also bring up a "New Message" by clicking on the "Compose Message" button on the main Outlook
Express toolbar.
Type your e-mail message into the large text area. Remember to provide a correctly formatted e-mail address i.e. something
like user@address.co.uk. You also need to type in a short subject heading for the message.
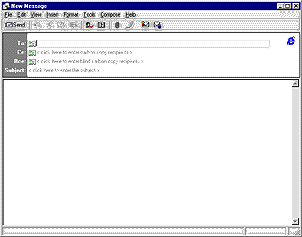
- If you want to attach a file to the message to send alongside it, click on the paper clip icon. This will bring up a select
file menu and you can then choose your attachment.

- Send it.
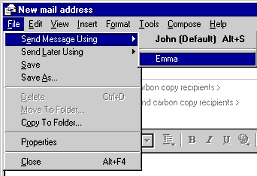
When you're ready to send your message, click on the "File" menu and select "Send Message Using". A
further menu will appear allowing you to select which address to send the message from. The message will now bear the correct
identification and reply-to address.
- Your message has now been sent. A list of the e-mails you have sent will appear on the right hand side if you click on the
"Sent Items" icon.
 D. Check your news settings.
Using Newsgroups in Outlook Express
- Set up your news account.
To use newsgroups, you need to set up a Freeserve News account in Outlook Express:
- Click on the 'Tools' menu and select 'Accounts'.
- Now click on the 'News' tab.
- Click on the 'Add' button on the right-hand side and select 'News'.
- You will have to fill in a series of boxes and press 'OK' to each one.
- For your name and e-mail address, enter your name and your Freeserve e-mail address. These will identify you if
you post messages to the newsgroups.
- For News (NNTP) server, enter 'news.freeserve.net'
- Enter a friendly name (say, 'Freeserve News').
- And finally select to connect using a phoneline and select your Freeserve connection from the next box.
You should now be able to access Freeserve newsgroups.
- Read newsgroups.
To read news, first download the list of Freeserve newsgroups:


![]() A. Check your mail settings
A. Check your mail settings![]() B. Adding a new mail account
B. Adding a new mail account![]() C. Reading and sending mail
C. Reading and sending mail![]() D. Check your news settings
D. Check your news settings


