

|
Freeserve Easy Guides |
|
|
|
|
|
Apple Mac |
When you have finished going through the Online sign-up, you will be asked to insert the settings given to you into your machine. Print the details out (or write them down), and keep them somewhere safe. You will need them to configure your Mac for Freeserve.
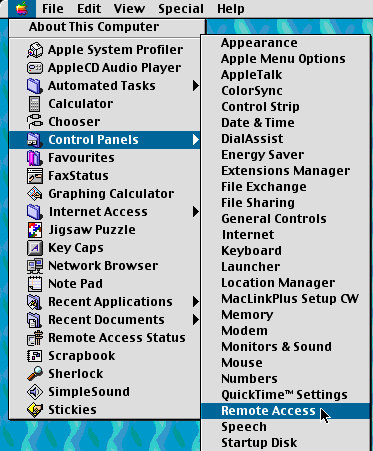
1. Open Remote Access. Click on the Apple Menu and select Control Panels, from their click on Remote Access.
2. When you have launched Remote Access, you will need to enter the settings supplied to you under the heading "Connecting to Freeserve".
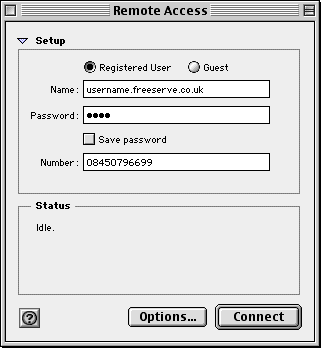
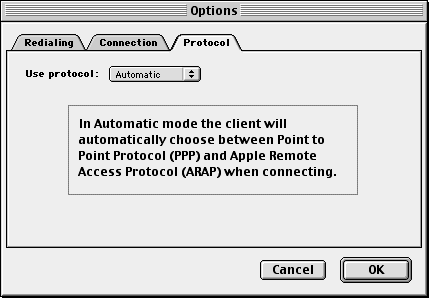
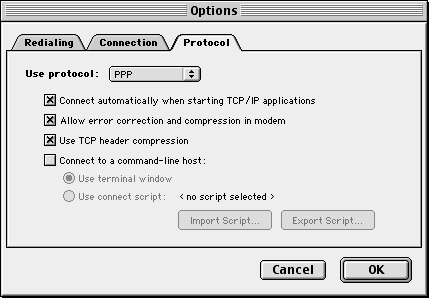
3. Now click on the "Options" button and select the "Protocol" tab.
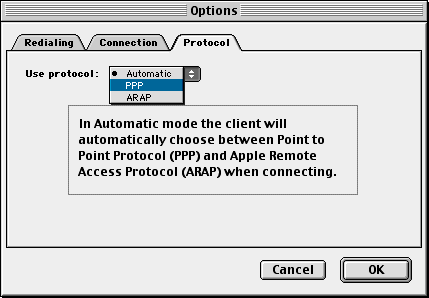
4. Click on the two arrows next to Use Protocol, and select PPP.
5. If you wish your machine to connect automatically when you launch your browser / email client, put a check in Connect automatically when starting TCP/IP applications. Error correction and TCP header compression also requires a check to be placed in the box. Once complete press Ok and close the Remote Access window.
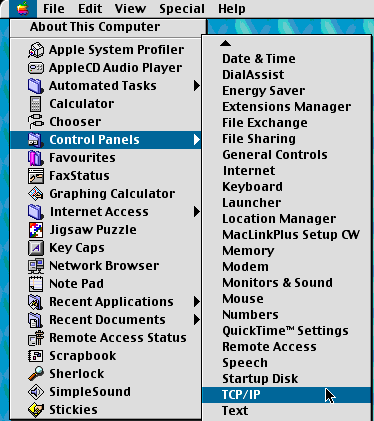
1. Click on the Apple Menu and select Control Panels, then click on TCP/IP.
2. If this is your first Internet connection you may get the following message on the screen:
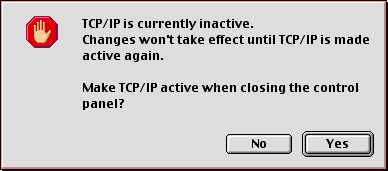
You need to press "Yes" at this point to enable use of TCP/IP.
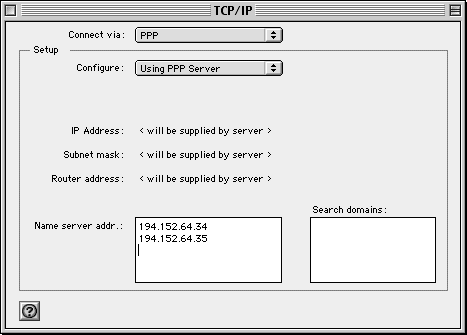
3. Click on the two arrows at the side of "Connect via" and select "PPP". Now click the two arrows beside "Configure" and select "Using PPP Server".
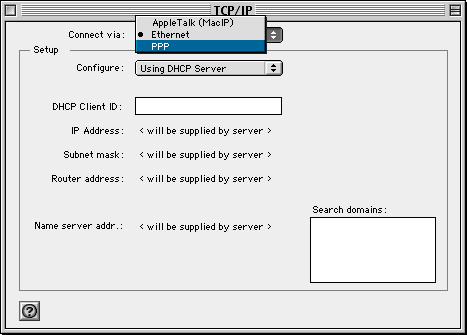
4. You now need to configure the protocol to work correctly with our server. Click in the box next to "Name server address", and type in the two IP addresses as shown below. Take care to press enter at the end of each line. There are no other changes to make to this screen. Close the window (by clicking the square in the top left of the window).When prompted to "Save changes to the current configuration?", click "Save".
1. If this is your first Internet connection you will see this alert box when you first double click on "Browse the Internet":

2. Select "Yes", and you will be greeted with this screen:

3. At this point we need to insert some settings to enable the browser to function correctly. Click on Preferences from the tool bar or menu bar in your browser. You will then be greeted with this screen:
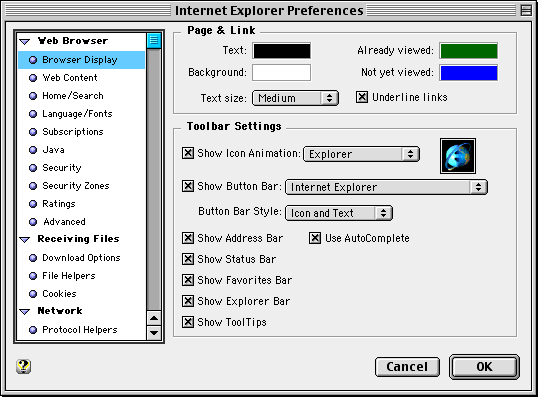
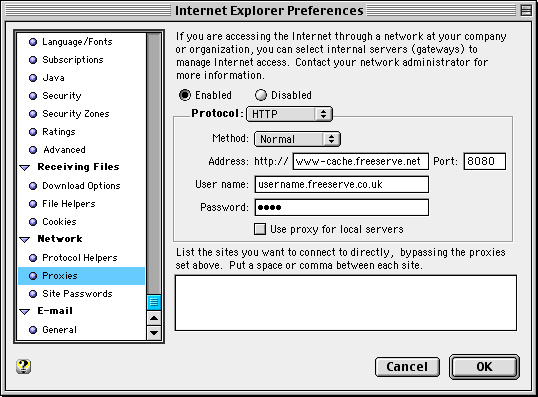
4. Scroll down the left hand column and select "Proxies". Enable the use of Proxies by clicking the circle next to "Enabled".
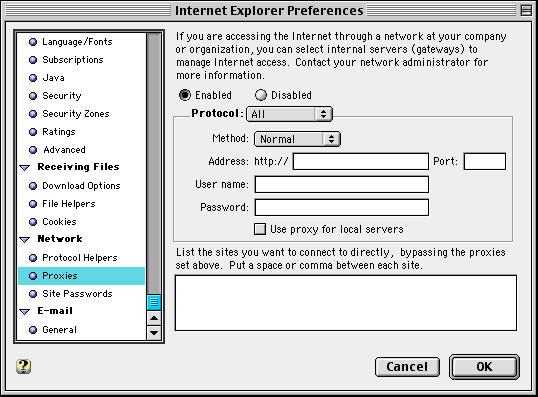
5. Click on the two arrows next to Protocol and select "HTTP" from the protocol list. In the address line type www-cache.freeserve.net. In the "port" box, type 8080 . You will then need to repeat steps 1-3 changing the protocol to "FTP".
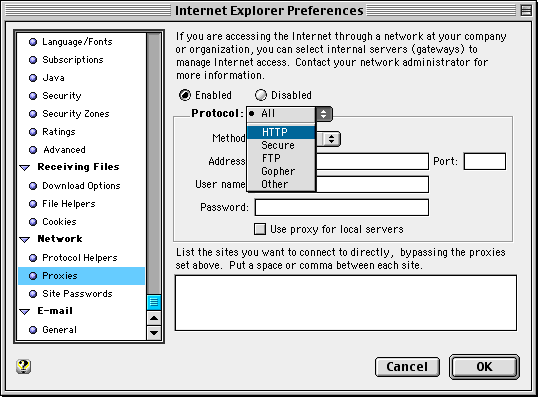 Figure 14
6. Once you have finished, insert your username and password and press "OK".
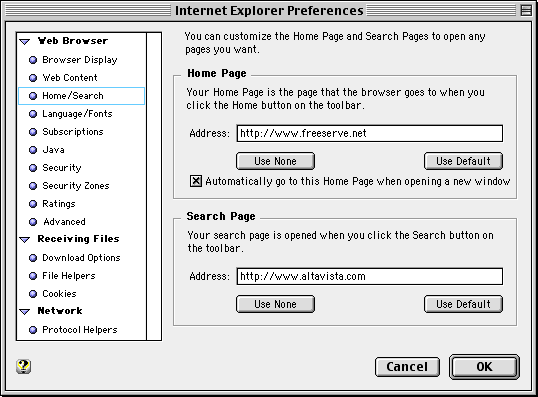
7. You will now need to enter the settings for our homepage and search pages. Under Home Page, in the address field type http://www.freeserve.net. Under Search Page, in the address field type http://www.altavista.com.
This section will set-up your email account, so you can quickly and easily send and receive your emails.
1. Click on the "MAIL" icon on your browser toolbar

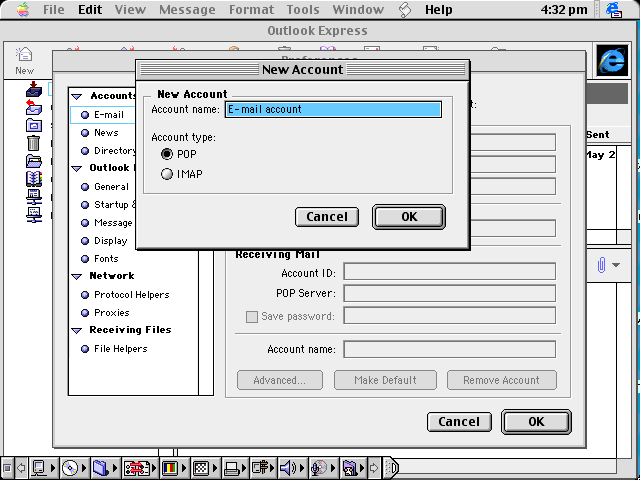
2. You will then be greeted with this screen. Make sure that it is set to use a "POP" account and press OK.
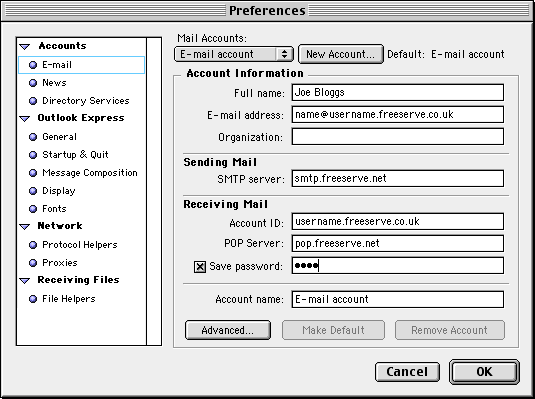
3. Put your name and your email address into the first two boxes. Enter smtp.freeserve.net as your outgoing mail server address. Insert your username, pop.freeserve.net as your incoming mail server, and your password into the next three boxes. We would suggest that you put a check in "Save password" at this stage.
4. We now need to configure your news server. Select "News" from the left column. The server name and address need filling in, just enter them as shown.
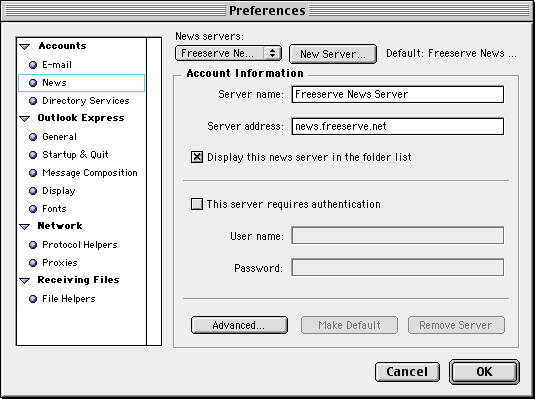
5. Press OK when you have finished entering all your details.
This completes your Internet setup for Freeserve.