This guide is now probably out of date a bit, some of the information here may still have value but I can’t confirm if these steps are still relevant. Leaving this published as there’s some community interaction below. I hope to review this guide at some point and re-publish on Computer Legacy – Dan
This is a quick guide that explains how to get Windows 98 Second Edition working under VMware’s Workstation 15 Player software.
Pre-Amble
Why VMware and not VirtualBox?
Although I personally prefer VirtualBox as a virtualization technology, I found that it was lacking in its support for Windows 9x operating systems. As Windows 98 Second Edition is my old operating system of choice (as it is the era that I am currently most concerned with) and is the operating system that I perform most of my testing in, I like to have a fully operational system with sound, graphics and networking.
I used to use VMware Workstation Pro, however Player does enough (feature wise) and is free to download.
For Windows XP however I suggest VirtualBox.
Virtual vs Physical
Personally, I would always recommend using a physical machine if you can. Certainly for gaming, as I have found virtualisation can get a bit iffy with some 3D acceleration. However virtualisation had benefits for testing/sandboxing or general tinkering as you can take copies of the system state before making big changes, allowing you to revert easily if you break something in a major way. Also virtualization is leaps and bounds faster than physical, even if you are running beyond the recommended hardware specs for the operating system.
Prerequisites
You will need to know, or have the following to be able to proceed with this. Only begin the process once you have confirmed you have the following.
Knowledge
I’m expecting you are reasonably competent with computers to have got this far. I’m going to use straight computer terms without explanation here. I’m expecting that you are comfortable amending your system BIOS configuration, able to install software and are able to download items from the internet.
Installation Media
I personally have copies of the Windows 98 Second Edition installation media with me, I have digital copies of these on my personal home server that I use for setting up virtual machines.
Copies of the CD-ROM and bootable floppy disk are widely available online, however for safety I would suggest downloading it from somewhere like Archive.org.
As of publishing the following entries are suitable:
If you have a physical CD-ROM and floppy disk then you can certainly connect the virtual machine to these drives on your host, however you may find the installation process is much slower than using digital copies.
System Ability to Virtualize
For this to work properly you will need to be using a host that can do virtualization. This is enabled via a technology referred to as VT-x. For many custom PC’s (systems you have built yourself) this will be enabled by default and won’t require enabling. For many pre-built systems (such as those from large manufacturers like Dell, HP or Lenovo) VT-x is likely disabled by default and will require enabling. Check your vendors documentation on how to enable this – however the process between vendors is rather simple and this blog entry at helpdeskgeek.com explains it well.
Not all systems can virtualize however – some lower end processors, laptops or tablets may not support virtualization.
Beyond enabling VT-x, you will also need to consider system resources on your host that you will need to allocate to the virtual machine. This mainly concerns RAM, disk space and CPU cycles. With modern computers on average containing a dual-core or quad-core processor, 4 to 8GB of RAM and at least 250GB of hard disk capacity this shouldn’t be too much of a concern. My personal preference is overkill when dedicating resources to the virtual machine, this means that I need to ensure I can spare 256MB of RAM and anywhere between 10 to 30GB of hard disk space.
Host Requirements
In the world of virtualization you will often hear the terms host and guest. (Host may also be referred to as hyper-visor.)
A host is the system to which the virtualisation software sits on. In this case it is likely your normal desktop PC or laptop.
A guest is used to describe any operating system that exists virtually under the host. In this case Windows 98 Second Edition is a guest on your host computer.
I write this guide expecting that you will be using the latest Microsoft operating system at the time of writing, Windows 10. However the basics will apply to Windows 7, 8 and 8.1.
For Macintosh users unforunately VMware do not create Workstation 15 Player for Macintosh systems.
For Linux users VMware do develop a .bundle application package for Workstation 15 Player, so most of the information provided below should be the same.
Process
Installing and Configuring VMware Workstation 15 Player
- Download the latest VMware Workstation Player software from vmware.com.
(Don’t worry that it says Try, if you read the text you can use it in full without limits for free in non-commercial, personal and home use cases)
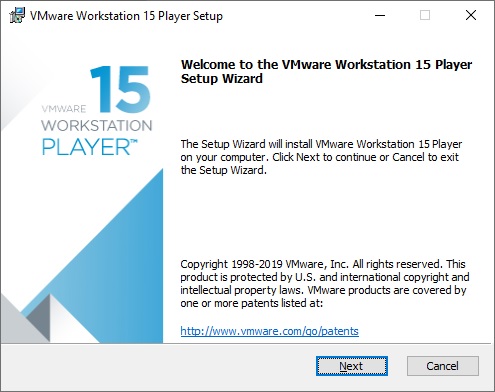
- Once downloaded run the installation on your system, you will reach the Setup Wizard. Click Next on the welcome page.
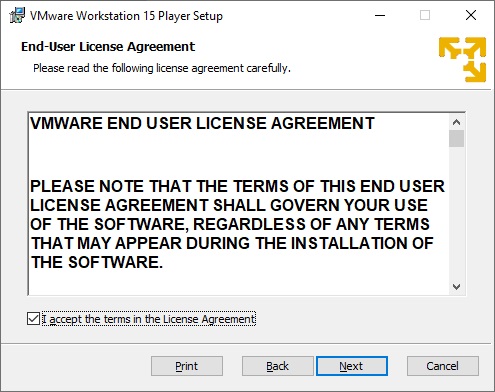
- Agree to the End User License Agreement (EULA), then click Next.
- Choose your installation destination, and tick the Enhanced Keyboard Driver option. Then click Next.

- Decide whether you wish for the application to check for updates upon startup or whether you wish to join the Customer Experience Improvement Program (CEIP). Click Next.

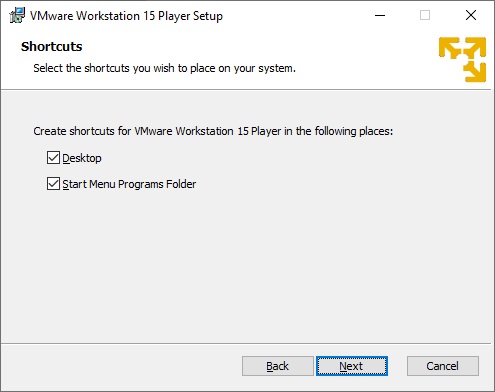
- Decide whether you wish the installer to create shorcuts, I suggest keeping the Start Menu Programs Folder option ticked. Then click Next.
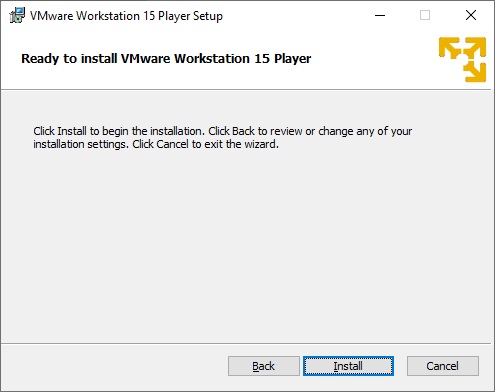
- When ready, click Install.
- Allow the installation to complete.

- When the process is complete click on Finish and choose whether to kick off a restart now or later.

- Assuming you have restarted before reaching this step, open the software from the shortcut in the Start Menu or Desktop.
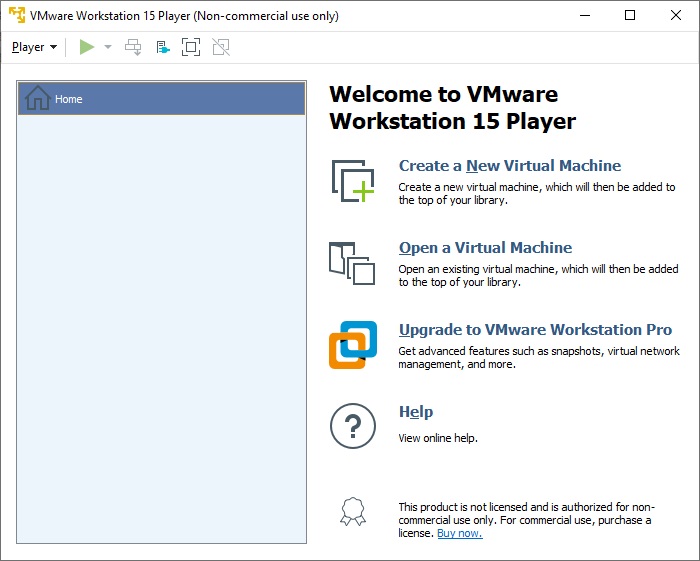
- Click on the big hyper-link on the right side of the window that reads Create a New Virtual Machine.
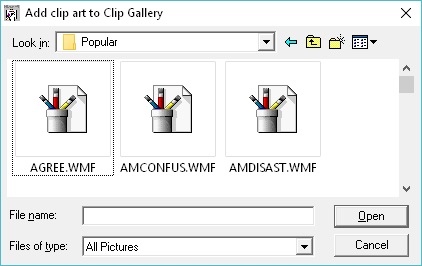
- You are first asked to provide installation media for the operating system. Select the middle option (Installer disc image file (iso)) and then Browse to the ISO file you downloaded earlier, or that you have of your copy of the operating system media.
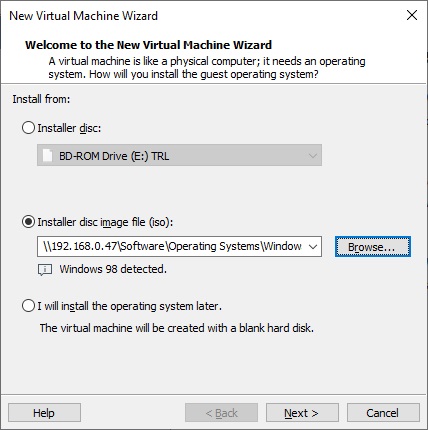
- For those who wish to use the CD-ROM drive in their systems and have a physical copy of the installer, you can choose the first option and select your optical drive. Insert your physical media now.
- After selecting your ISO file, VMware Player should now detect that you are going to be installing Windows 98 (this will show for either the first or second edition). If it does not, check your ISO file has downloaded properly or locate a different ISO file. Click Next to proceed.
- You now need to give the virtual machine we are creating a name, this can be whatever you like – but for simplicity here, mine will be called Windows 98SE. You can also choose where the virtual machine files will be kept, I like to keep mine on my larger second hard drive – but you can keep the original location if you wish. Click Next when ready.

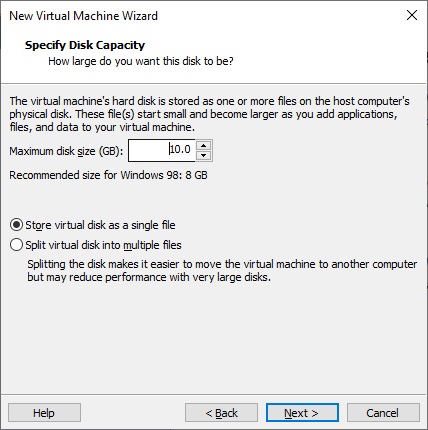
- You are now asked to specify how large the hard disk should be. By default VMware will choose 8GB, which is plenty – however I like a lot of space so I have increased mine to 10GB. I also set the option to Store virtual disk as a single file. Click Next to proceed.
- On the summary page quickly check that everything looks OK. You will see that VMware has automatically allocated 256MB of system memory (RAM) for the virtual machine, we can change this soon if this is too little/too much. Untick Power on this virtual machine after creation and click Finish.

- Now you should have one entry in the left pane of VMware Player with the name you specified in step 14. Click on Edit virtual machine settings on the right pane.

- The Virutal Machine Settings window should appear. It will open automatically on the Memory option, you can specify how much memory you wish to give the virtual machine.
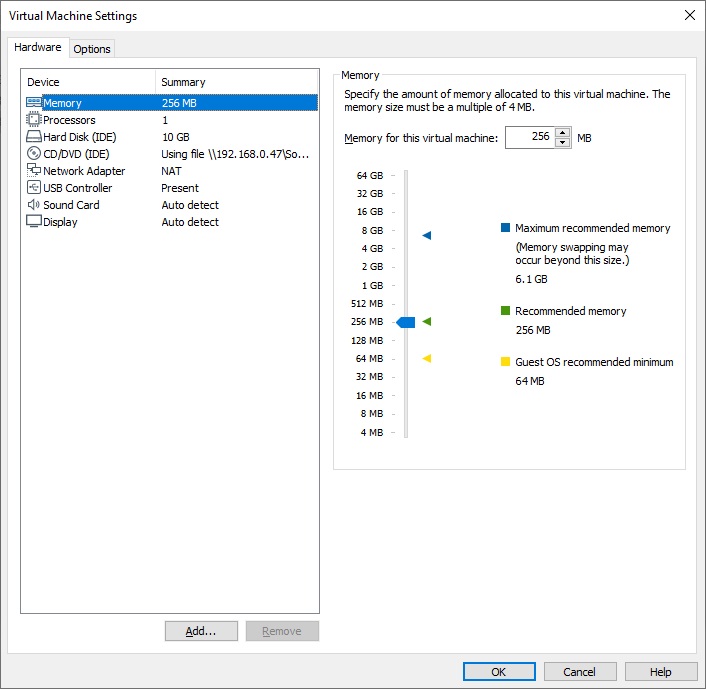
- You may notice that something is missing, we have no floppy disk device listed. Click on Add at the bottom of the window, the Add Hardware Wizard dialog will appear.
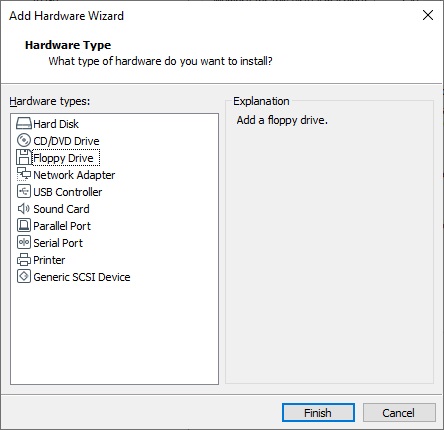
- Choose Floppy Drive from the list of options and click Finish.
- You will be returned to the Virtual Machine Settings window but with the Floppy device selected. On the right side ensure that Connect at power on is ticked. Select Use floppy image file and then click Browse. Locate the bootable floppy disk image (.img file) you downloaded earlier. Click OK to save changes.

- You are returned to the VMware Player overview, click on Play virtual machine in the right pane.

- The virtual machine will begin to boot up, click into the black window to gain control of the virtual environment. If you need to leave the virtual environment and return to the host you need to press CTRL+ALT on the left side of your keyboard. I would take this time getting used to switching between the environments.
- Hopefully by this point the virutal machine has loaded the bootable floppy disk image, and is awaiting your input. See the next section which will guide you through the Windows setup process.

Installing Windows 98 Second Edition
OK so hopefully you have successfully set up the virtual machine as per the instructions above, and you are sitting at the Microsoft Windows 98 Startup Menu prompt.
- Click into the virtual machine window to gain control. Using the cursor keys on your keyboard select the first option Start Computer with CD-ROM support.
- The screen should fill up with some text as the virtual machine loads the CD-ROM driver from the floppy disk image and loads a basic DOS operating enivronment. You should then reach a prompt that reads A:\ and a flashing cursor.
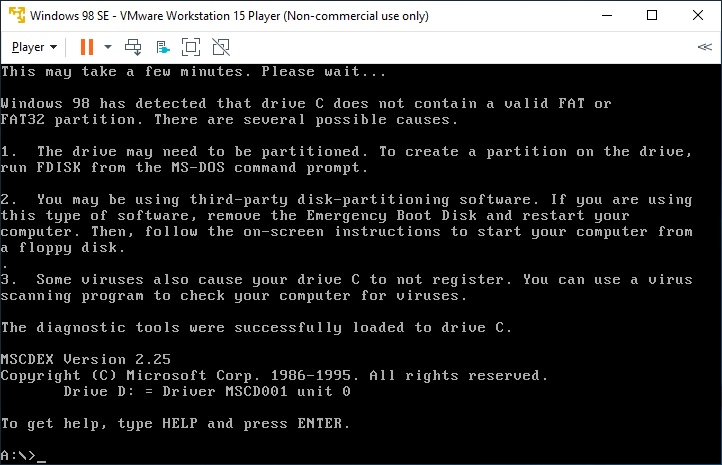
- Type in the command fdisk and then press the enter/return key on your keyboard.
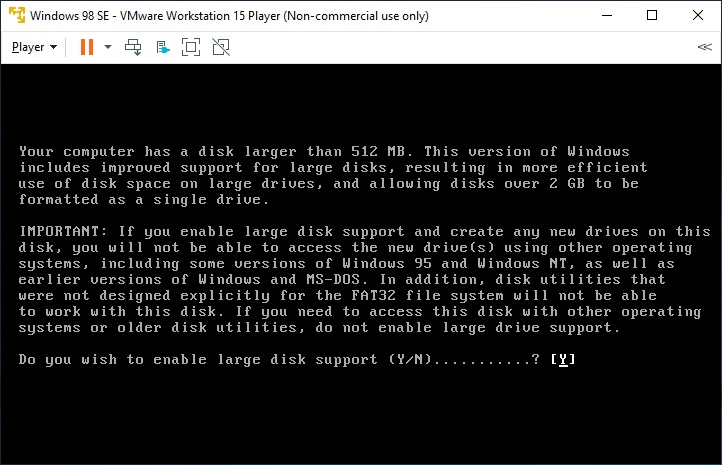
- You will now come to a screen with a lot of text. The fdisk application is simply asking whether you wish to enable Large Disk Support, as our hard disk is at least 8GB we will press enter/return on our keyboards to accept the default value of Yes.
- You should now be at a menu. We are going to begin to format our virtual hard disk file into a format that Windows 98 can understand, press enter/return on your keyboard to accept the default value of 1.

- You are now asked what type of partition we wish to create, again accept the default value of 1 to Create Primary DOS Partition by pressing enter/return on your keyboard.

- You will now be asked whether we wish to use the maximum size available, the answer to this question is Yes – so press enter/return to accept the default value of Yes.

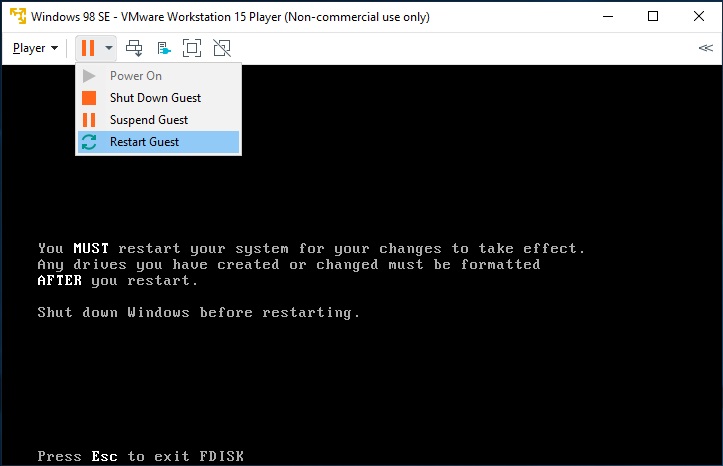
- You may hear a beep to confirm that this process has been completed and a message asking you to reboot your system. Press CTRL+ALT to release control from the virtual environment and from the top toolbar choose the arrow next to the Pause button and choose the option Restart Guest. Accept the warning that may display. The virtual machine will reboot.
- The system will boot back into the first menu of the bootable floppy image, again choose to start the computer with CD-ROM support.
- You will now be back at the DOS prompt reading A:\ with a flashing cursor type the following command format C:

- Type the letter Y and then press enter to accept that all data on the drive assigned letter C: will be lost. The virtual machine will then begin to format the virtual hard disk, this is extremely quick in a virtual environment.

- Once the format is completed you are asked if you would like to provide a volume label for the C: drive, I do not bother with this but you could type something like OS if you wished.

- Now the disk is formatted you will be returned to your DOS prompt reading A:\ with a flashing cursor. The CD-ROM driver that ran at the beginning of this process should have assinged the virutal CD-ROM drive a letter such as D: or E:. Normally this is E:, so when accessing files on the CD-ROM (or inside the ISO) you would begin the path with E:\. At the prompt type E:\setup.exe – this will start the Windows Setup stored on the CD-ROM.

- The setup program will now inform you that it wishes to perform some routine checks – this is mandatory, press enter/return on your keyboard to start the checks.

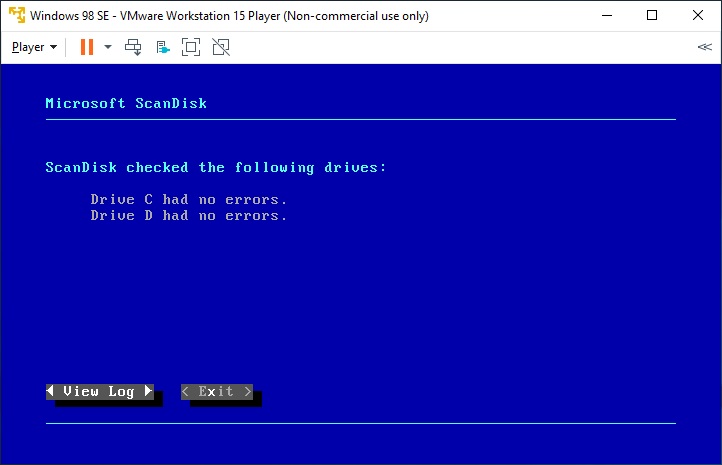
- The routine checks is actually Microsoft lingo for, we are going to check your hard disk isn’t broken. Microsoft ScanDisk will quickly check your hard drives, again this happens very quick in a virtual environment and as the virtual hard disk file is brand new it is unlikely to report any issues. If this step fails it likely means that you have not formatted the hard disk partition properly. Press x on your keyboard to leave the Microsoft ScanDisk program.
- Now we are cooking! You should be greeted by the Windows 98 setup wizard. Don’t worry that it thinks the installation will take up to an hour to complete, it will happen much quicker (although not as quick for those using physical media). Click on Continue to proceed with the installation.

- The setup will then load some files from the CD-ROM.
- The first step is to agree to the License Agreement, choose I accept the Agreement and then click Next.

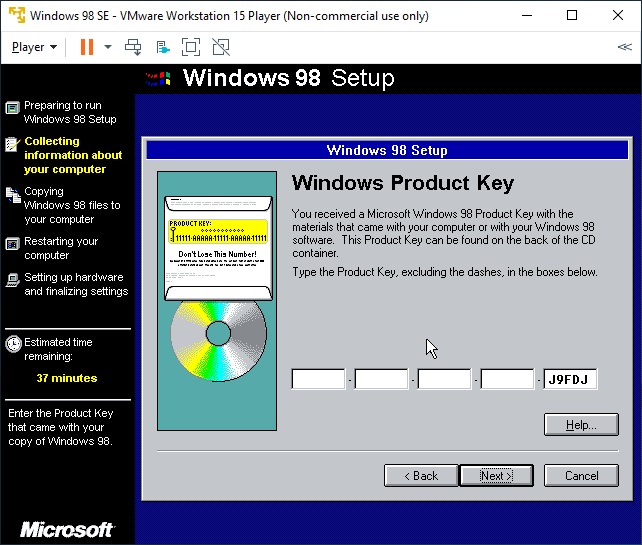
- The first hurdle you will need to provide a product key. Product keys for Windows 98 Second Edition can be obtained easily online, type in a product key you find online and click Next.
- You are now asked where you wish Windows to be installed – my personal opinion on this is leave it as the default value of C:\Windows for compatbility with applications. Click Next to proceed.

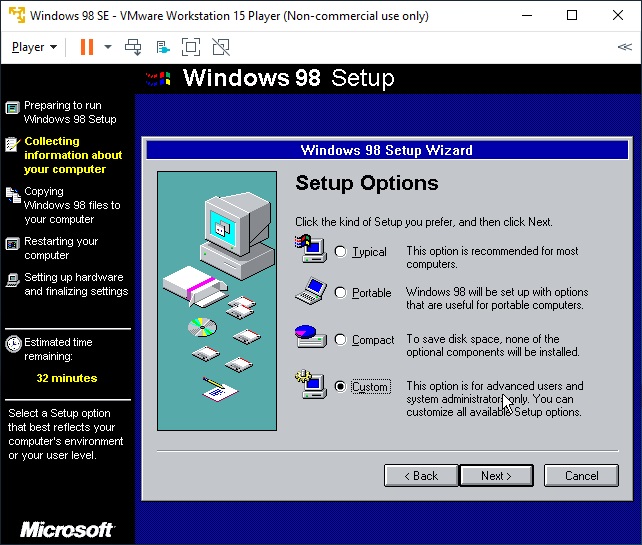
- Now you are asked what kind of setup you wish to perform. There should be no need (except for curiosity maybe) to choose Portable or Compact. Typical will serve most people plenty, but I like to have mostly everything included so I choose Custom. Click Next to proceed.
- Now the wizard will ask for your name and company. The name will become your username. Type whatever you feel is appropriate here. Click Next when you have completed these fields.

- If you chose Custom on step 22 you are probably going to be asked what components you wish to have enabled. You can choose to remove or add certain features, I will try my best to explain what these will do:

- Accessibility click Details to view sub-options
- Accessibility Options this enables the accessibility options control panel options – although I do not have any accessibility issues, I like to keep this enabled.
- Accessibility Tools this enables the magnifier, the Accessibility Wizard and adds the high-visibility cursors (which are black). I enable this option as I like the additional cursors.
- Accessories click Details to view sub-options
- Briefcase this is a way for power users to quickly synchronize their data from their local C: drive to a removable device (such as a floppy disk, ZIP drive or USB drive). Later removed in Windows 8, there is little use for this but as it takes up no space and I like the icon so I enable this.
- Calculator this will either add or remove the calculator from the operating system. I like to keep this enabled.
- Desktop Wallpaper if you are wanting to make the most of the nostalgia experience of Windows 98 then I highly suggest enabling this which includes a selection of background images for the desktop.
- Document Templates honestly never really had much use for this, and templates are included with most word processor/spreadsheet/desktop publishing packages (such as Microsoft Office or Microsoft Works). I keep this enabled for compatibility sake, although disabling it will likely have little negative effect.
- Games much like the Desktop Wallpaper option, you’re likely here for nostalgic purposes so I would enable this as it adds FreeCell, Hearts and most imporantly Minesweeper and Solitaire to your installation.
- Imaging I keep this enabled as it provides an Image Viewer and TWAIN support – it is helpful in regards to compatibility.
- Mouse Pointers same reason for enabling Desktop Wallpaper and Games, enable this to get all the fun cursor packs included with Windows 98 SE.
- Paint although many will also want to keep Paint for nostalgia purposes, I suggest keeping it for compatibility so you can easily open supported image file types.
- Quick View this was like an early preview pane, of which a preview of a document will appear on the left pane of Windows Explorer. I enable this because it can be quite a nice visual effect – however it is not mandatory, and has little negative effect if left unticked.
- Screen Savers this makes up the nostalgia part of the Windows 98 install, enable this to get the standard screensavers such as Flying Windows and the 3D OpenGL screensavers. Click Details and enable the Additional Screen Savers option to also add Flying Through Space, Mystify Your Mind, Curves and Colors, Scrolling Marquee and Blank screen saver options.
- Windows Scripting Host leave this enabled for compatibility reasons.
- Address Book I keep this enabled as it is selected by default but it ultimately has little use.
- Communications click Details to view sub-options
- Dial-Up ATM Support – seeing as VMware doesn’t have a modem option you can leave this disabled.
- Dial-Up Networking – much as the same as before you can disable this if you wish.
- Dial-Up Server – see previous notes on Dial-Up components.
- Direct Cable Connection – really only useful for physical setups where you may wish to connect two devices together via serial or parallel cable (to share files for example). Little use in a single virtual machine environment. Leave disabled.
- HyperTerminal – if you are intending to dial into some Telnet servers using your Windows 98 virtual machine enable this.
- Microsoft Chat 2.5 – a utility that can be used to chat with other people via IRC. If you have an IRC server you wish to connect to using your Windows 98 virtual machine then enable this. This is also the name for Microsoft Comic Chat if that is your kind of thing. I enable this because it can be useful.
- NetMeeting – this is effectively an early version of Skype or Windows Messenger. I’m not aware that it has much use anymore, and is unlikely going to be of much use if you are just running one Windows 98 client on your LAN.
- Phone Dialer – Enabled by default and takes up little space, but ultimately useless without a modem device – which is not supported.
- Virtual Private Networking – VPN’s are quite common these days and people are becomming more and more used to their presence. VPN’s were quite new back then, enable this if you want to do some VPN testing 1998 style, otherwise you can leave this disabled.
- Desktop Themes if you are wanting to get the full nostalgic experience I suggest ticking this which will enable all of the below 17 theme packages.
- Baseball a theme about the American sport Baseball
- Dangerous Creatures a theme about Dangerous Creatures
- Desktop Themes Support a requirement if you want to use any of the other 16 theme packages.
- Inside Your Computer a theme that is computer hardware inspired
- Jungle a theme that is Jungle inspired
- Leonardo da Vinci a theme that has elements of da Vinci’s artwork included.
- More Windows another extended Windows 98 theme
- Mystery a mystery inspired theme
- Nature a nature inspired theme
- Science a science inspired theme
- Space a space inspired theme
- Sports a sports inspired theme
- The 60’s USA a theme with nostalgia from 1960’s America
- The Golden Era a theme about the golden era which if I remember is the 1950’s?
- Tavel a theme about Travel
- Underwater an underwater inspired theme
- Windows 98 a Windows 98 inspired theme
- Internet Tools click Details to view sub-options
- Internet Connection Sharing ultimately pointless to enable this for a virtual machine, has slightly more purpose on a physical machine.
- Microsoft Wallet a “secure” (for 1998) way to store private information when internet shopping – ultimately obsolete.
- Personal Web Server could be interesting if you are wanting to play around with early web design, enabled by default.
- Web Publishing Wizard again could be interesting if you are playing with web design, but is more intended for uploading to external servers.
- Web-Based Enterprise Mgmt ultimately pointless for most use cases, enable if you are wanting to play around with late 90s Enterprise management.
- Multilanguage Support click Details to view sub-options
- I’m not going to list out the languages which are on my installation media. The list of languages will vary depending on the installation media copy you have – honestly only enable languages if you require them, otherwise leave these all unticked.
- Multimedia click Details to view sub-options
- Audio Compression keep this enabled for compatibility when needing to playback multimedia files.
- CD Player ultimately not very useful in a virtual environment, but if you were wishing to connect the virtual machine to your physical optical drive you can play around with the CD Player.
- Macromedia Shockwave enabled by default, although a very old version of Shockwave. I keep this enabled (by default) for compatiblity with software that uses offline Shockwave content.
- Macromedia Shcokwave Flash kept enabled, see previous note for Macromedia Shockwave.
- Multimedia Sound Schemes enable this if you are going for the full nostalgia stack.
- Sample Sounds again enable if you are going for a nostalgia curve with this install.
- Sound Recorder a little difficult to get a microphone to pass through to the virtual machine, but you don’t gain much by removing it.
- Video Compression see note for Audio Compression
- Volume Control considering we chose VMware for its sound support in Windows 98 it seems silly to not include a volume control. Enable.
- Online Servies I suggest unticking this unless you are wanting to maybe play around with an early copy of AOL. These were included so that new Internet users could easily sign up with an ISP (AOL, AT&T, CompuServe or Prodigy) however none of these work anymore.
- Outlook Express if you are wanting to play around with early e-mail client and functionality Microsoft’s cut down mail client isn’t a bad place to start.
- System Tools click Details to view sub-options
- Backup useful if you are wanting to perform of-the-era backups, but there are much easier ways to backup your data with a virtual machine (explained later). I leave this disabled.
- Character Map I enable this as a character map can be helpful in some situations.
- Clipboard Viewer again this is a quality of life feature, if you think it will help you then enable it.
- Disk Compression Tools although we have a massive 10GB to play with (or more) I don’t think we require this, but its enabled by default so I leave it on.
- Drive Converter (FAT32) keep this enabled as it is on by default.
- Group Policies only enable this if you are wanting to see what an early adoption of Group Policy management is like. Otherwise leave disabled.
- Net Watcher really only for enterprise or network testing case scenarios. Leave disabled.
- System Monitor you can enable this if you are performing development or legacy app troubleshooting, otherwise leave disabled.
- System Resource Meter see System Monitor
- Web TV for Windows this simply doesn’t work anymore due to it being obsolete as of 2014, and the software included here was probably long dead way before then. Keep this disabled.
- The setup will now ask you to provide a computer name. I suggest giving the computer a useful name. Don’t worry too much about Workgroup unless you are wanting to try and connect to other machines via one. You can set the Computer Description to whatever you please. Click Next to proceed.

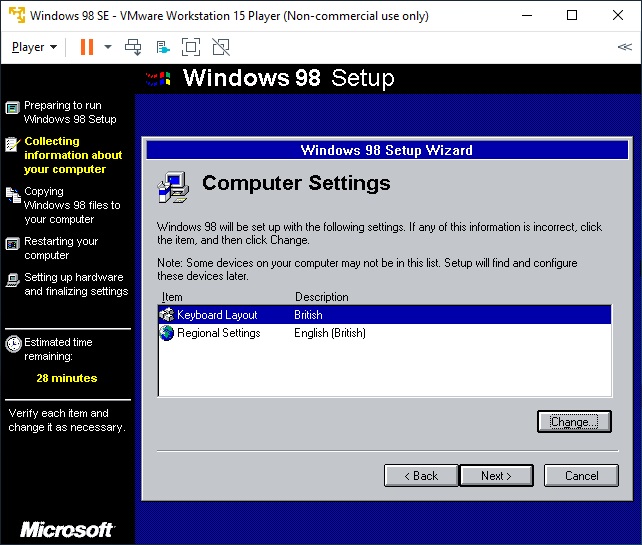
- You are then asked for your keyboard and region preferences. This is likely pre-selected by the type of installation media you are using. Most images available online are from the USA and so this will likely read United States – however my image is from a UK released CD-ROM so it defaults to British. Ensure you have the right keyboard input selected for your hosts keyboard, makes things a lot easier. When ready click Next to proceed.
- You are now asked to confirm your location, choose your country and click Next to proceed.

- The wizard will now ask to create a startup disk, this is probably identical to the boot disk image you found earlier. I personally don’t like to overwrite this image with the data from this setup so I perform the following steps:
- Press CTRL+ALT to leave the control of the virutal machine
- Click on the button Player in the toolbar.
- Drill down through the menus Removable Devices > Floppy
- Choose Disconnect from the menu
- This has now effectively “ejected” your virtual floppy disk image
- Now return to the wizard and click Next
- It will attempt to create the startup disk but fail with an error, click Cancel to skip the creation of a startup disk.

- We are finally at the point where the wizard will begin to copy the operating system to the local hard disk. Click Next to start this process.

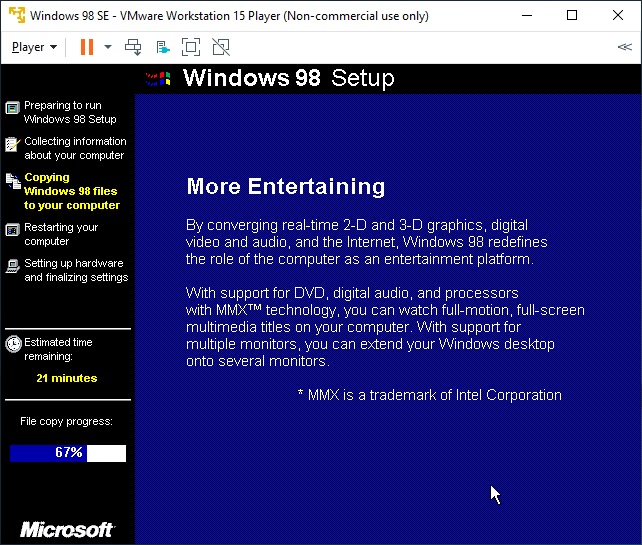
- You will now enter the famous Windows 98 setup process where you are bombarded with information about all the cool new features that Windows 98 includes. Allow this process to complete which may take around 10 minutes.
- If you haven’t already, I suggest disconnecting the virtual floppy drive device to avoid weird results when the setup wizard forces a system reboot
- Press CTRL+ALT to leave the control of the virutal machine
- Click on the button Player in the toolbar.
- Drill down through the menus Removable Devices > Floppy
- Choose Disconnect from the menu
- This has now effectively “ejected” your virtual floppy disk image
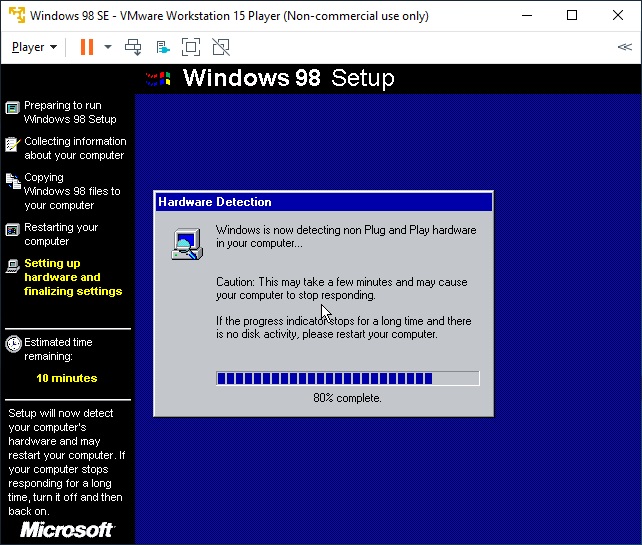
- The setup will now proceed to perform a Hardware Detection routine, you should encounter no errors during this part – simply let it complete.
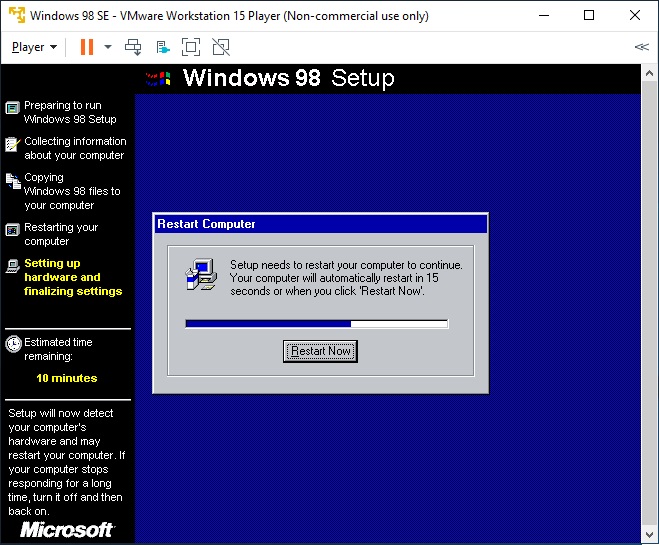
- The setup will then inform you it is going to restart your machine. I hope you’ve disconnected your virtual floppy disk drive!
- After the system reboots you may return to the setup to a dark blue screen with no dialog boxes. Allow a few moments to pass and eventually the setup will proceed.
- You are now asked to set your date and time. I always suggest you make sure that the time is correct (VMware Player will be forwarding the time and date found on your host) as well as setting the appropriate time zone. Click Apply to confirm. Click OK to proceed.

- The wizard will now complete the last few sections automatically, namely Updating System Settings with a cool little drum animation.

- The wizard will now complete its last reboot, goodbye setup!

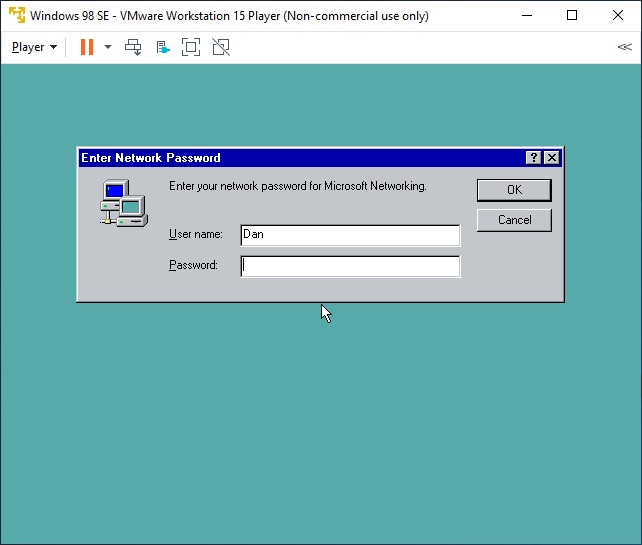
- The system will now boot normally into Windows 98 Second Edition, it will likely be very quick. You will also likely come to a password prompt. Don’t fret, you’re right we didn’t set a password so simply click OK to sign in.
- Windows will now begin its famous Hardware Dection sequence again you should not be prompted to provide any additional drivers at this stage.
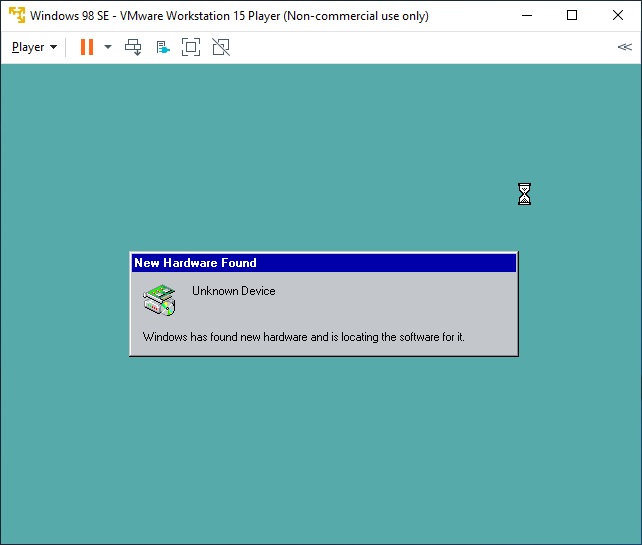
- You will now be at the Windows desktop – a familiar place for sure. However it probably doesn’t look the way you remembered it. The issues are that we are in a very low resolution and color depth mode which makes everything look well.. crap. Not only that we also are lacking sound – “I thought you said that VMware Player supports sound with Windows 98” I hear you cry. Fear not, we are going to address these issues in the next section.

Finishing Touches (Driver Installation etc.)
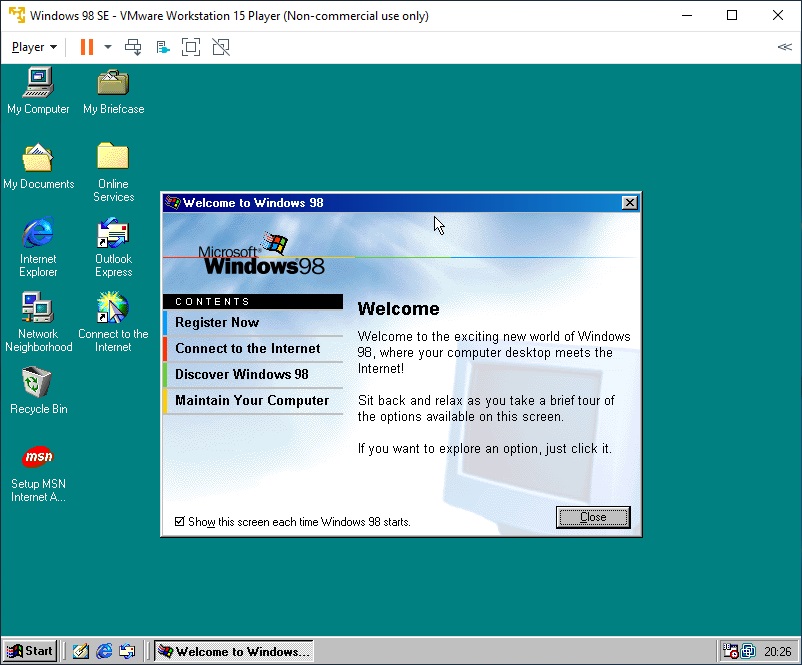
So hopefully you have successfully installed the operating system files onto your virtual hard disk and the virtual machine is now showing a frankly beautiful Welcome to Windows 98 dialog box.
- Close the Welcome to Windows 98 box, we can come back and look at this later. I suggest not unticking the Show this screen each time Windows 98 starts just yet because this annoying little application is quite useful in that it blasts a fanfare each time it starts – great for testing sound. It also has some high colour images which will also confirm that we have graphics installed properly.
- OK press CTRL+ALT to leave control of the virtual machine and click on the Player icon in the toolbar
- From the context menu choose Manage and then Install VMware Tools

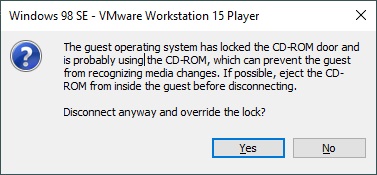
- You will then see a small information prompt, agree to override the CD-ROM lock. What this will do is unmount your Windows OS installation ISO image and mount the Windows 9x VMware Tools ISO image. Press Yes.
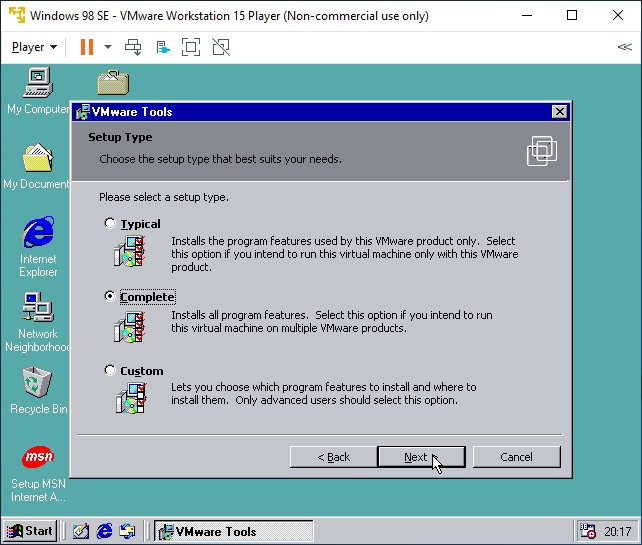
- Due to the glory that is Autorun you should see your virtual Windows 98 machine begin to twich as it loads the contents of the VMware Tools CD. An install wizard will now appear on screen, click Next.

- When choosing what to install, select Complete. This will ensure that everything we need gets installed.
- Begin the installation by pressing Install.

- The setup will then begin to install drivers for various components such as video, sound and mouse. This can take up to 5 minutes to complete.

- You may see the override lock message appear again, click Yes on this message only when the Installation Wizard Completed window appears in the virtual machine environment. You may in turn see an error inside Windows 98 that reads Eject Request to Drive in Use – click OK to this dialog and then Finish on the setup wizard.

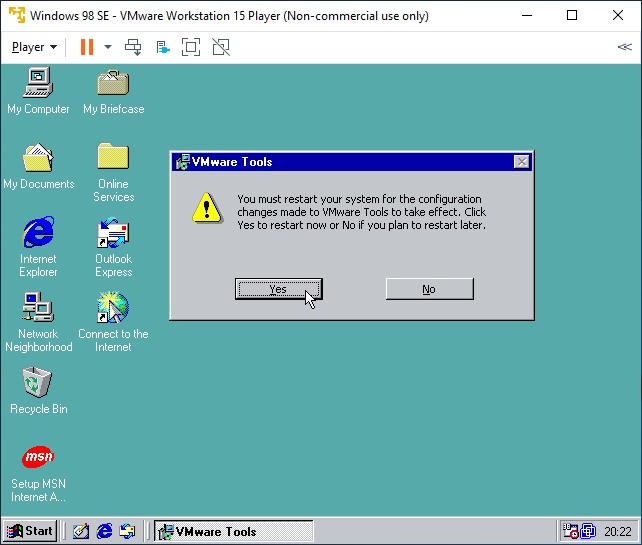
- You will then be prompted to reboot Windows 98 – click Yes. This is to apply the changes.
- As the system reboots you will find your virtual machine window size will grow, this confirms that the video driver is working as it has adopted a higher, but safe resolution of 800 x 600. When you reach the Network Password prompt click OK to start Windows 98.

- Hooray we are back basking in the warm glow of the Windows 98 desktop in full 32-bit colour, Welcome to Windows 98 should have appeared automatically. But no fanfare, no audio and no volume control in the notification area.
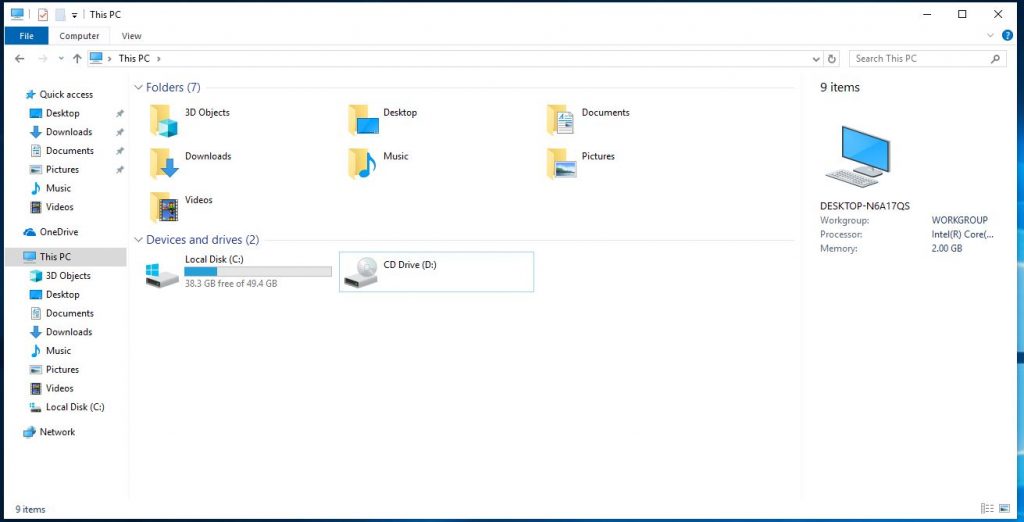
- Once again close Welcome to Windows 98 and still don’t untick the Show this screen each time Windows 98 starts option. From the Windows 98 desktop double click on the icon for My Computer. You should now see a familiar Windows Explorer style interface, and that your Windows 98 Second Edition virtual CD-ROM image is still loaded into drive D:. Press CTRL+ATL to release control of the virtual machine.

- Download this small ISO image file to your hosts computer (don’t download this inside the virtual machine).
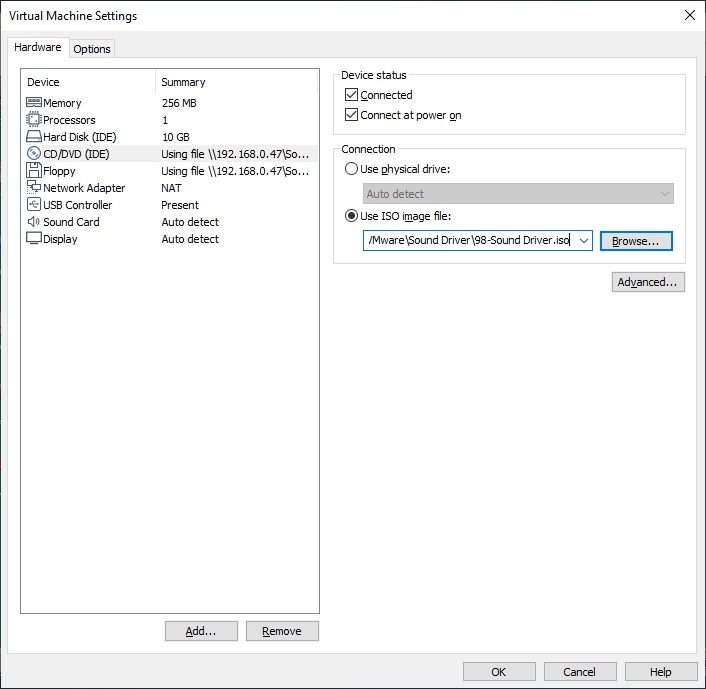
- Go back to VMware Player and click on the Player button on the toolbar, then Removable Devices, CD/DVD (IDE) and then Settings…

- With the Virtual Machine Settings dialog open click on Browse after Use ISO image file: and locate the ISO file you downloaded in step 15. Click OK to save changes and press Yes to override the CD-ROM lock.
- With those dialog windows closed you should now see My Computer read that a CD named Sound Driver is inserted into the CD-ROM drive. If it doesn’t click View from the menu bar and choose Refresh.
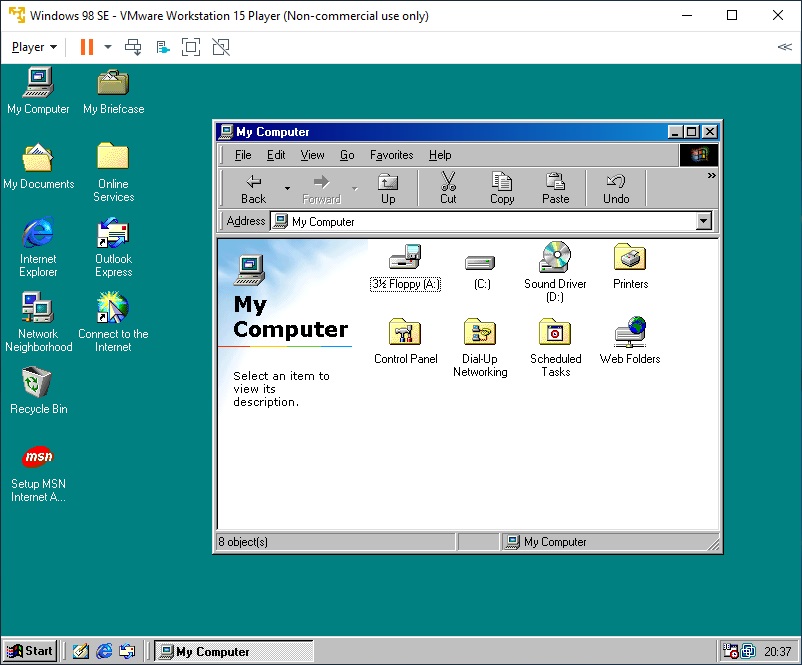
- Double-click on the CD-ROM drive and it will display its contents, one file named SBPCI_WebDrvsV5_12_01.exe. Copy this file to the Windows desktop.

- Press CTRL+ALT to release control of the virtual machine and then click on the Player button on the toolbar, then Removable Devices, CD/DVD (IDE) and then Settings…
- Follow the on-screen prompts to complete the installation, first by agreeing to the EULA.

- From the settings dialog change the Use ISO Image file path back to the location of your Windows 98 Second Edition installation media (click on the dropdown before the Browse… button it should be in the list) and then click OK to save changes. Again accepting the lock over-ride dialog.

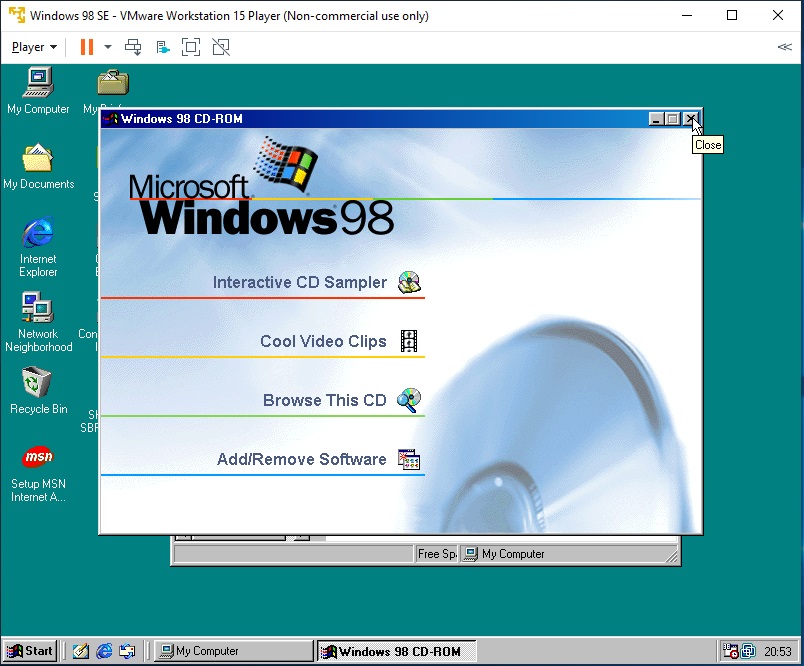
- Return to the virtual machine and close the automatically opened Windows 98 CD-ROM dialog that has appeared.
- Navigate back to the Windows desktop and double-click on the SBPCI_WebDrvsV5_12_01 file to begin the setup wizard.

- Click Yes to accept the EULA and the setup wizard will begin to deploy the driver files to the operating system.

- Allow the setup to complete adding each individual device – this can take up to 5 minutes.
- If you encounter an error asking for you to inser the Windows 98 Second Edition Setup CD-ROM ensure that you have loaded the correct ISO file in the virtual machine settings
- The setup wizard will then ask if you wish to restart your computer – choose Yes, I want to restart my computer now and click Finish.

- Allow Windows 98 to reboot. You will again return to the Enter Network Password screen, click OK to proceed.
- This time you should be greeted by the Welcome to Windows 98 dialog box and it should begin to play music at you – confirming your sound card is now functional.
- With that complete you are now able to do as you please with your new found Windows 98 Second Edition virtual machine.
Final Thoughts and Additional Tasks
If you follow this guide I am certain that you will end up with a high quality virtual machine ready for whatever you wish to throw at it. Of course things may be slightly different depending on the version of install media you choose – if things are greatly different please let me know in the comments as it would be interesting to see how.
Backing Up Your Virtual Machine
So you’ve spent all this time setting up a fresh Windows 98SE virtual machine, wouldn’t it be a terrible thing if the first application you installed in the virtual environment corrupted the operating system?
Well it’s actually quite easy for this to happen. So to avoid a lot of time loss I highly suggest following the following steps to quickly take a copy of the virtual hard disk file, so that in a case of emergency you can quickly roll back to this fresh copy.
VMWare Player doesn’t include an automatic backup solution – nor does it support snapshots, so this is a bit of an old-fashioned manual process.
- Shut the virtual machine down if it is already running
- Open the VMware Workstation 15 Player software from your Start Menu or from your Windows Desktop (host)
- Select your Windows 98 Second Edition virtual machine from the left hand pane and click on Edit virtual machine settings
- Select the Hard Disk (IDE) device from the list. The right pane will show a value under Disk file which will read back the path of your virtual hard disk file (.vmdk)
- Using Windows Explorer navigate to the file location and locate the .vmdk file. The file should be less than 500MB in size if you have only just completed the above process.
- Copy this file to another location such as a network storage location (e.g. NAS, home server), cloud storage (e.g. Dropbox, Google Drive), removable media or somewhere else on your hosts hard disk drive.
Now in the situation you break your virtual machine’s operating system you can come back and copy this .vmdk file back into the VM directory and start-over again without having to perform everything above.
Adding Additional Software
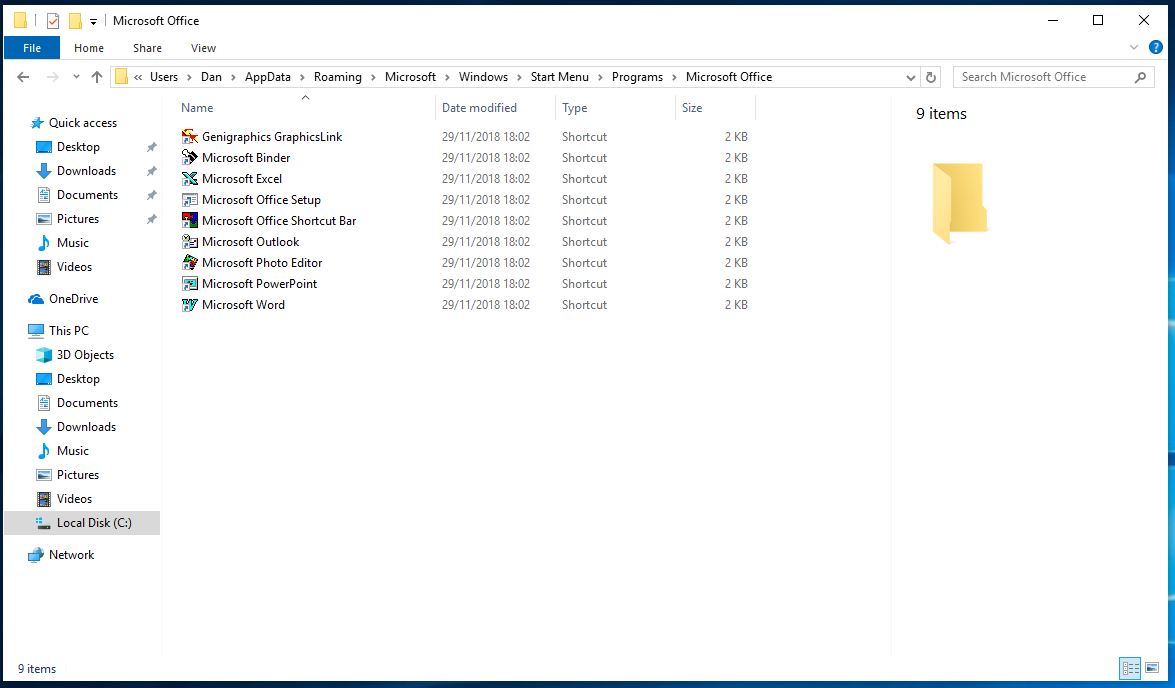
Many people after achieving the above wonder how they can get their software (such as old versions of Microsoft Office) or their games into their virtual machine.
The easiest way is via .ISO files. You can see this guide which explains how to create .ISO files in moments using free software such as ImgBurn.
Any .ISO files you find online you should be able to mount into your virtual machine without too much issue.
Getting Online
Take it from me, getting on-line with Windows 98 SE is pretty miserable. The operating system includes Internet Explorer 5 by default which can just about load google.com over plain HTTP. As you can imagine anything remotely complex causes all kinds of strange behaviour and rendering issues.
I have had some success getting online with an old version of the K-Meleon web browser (version 1.5.4) which can display some modern web pages better than IE5 ever could.
Keep in mind that most software made for the Windows 98 era which had on-line functionality probably no longer works. If the software asks to reach out to the internet, try and get it to use your LAN connection (sometimes referred to as a T1 connection) which is how your Windows 98 SE virtual machine is connecting out to the internet. If the software insists on using a modem to dial out to the internet then frankly you’re likely out of luck.
High Resolutions
If you have followed the guide above your Windows 98 Second Edition virtual machine is probably runnning at a safe 800 x 600 pixels – which although perfect for the era, can appear tiny on 1080p screens (or barely visible on anything higher). Luckily the VMware SVGA II graphics adapter can support some truly bonkers resolutions for the era, with my virtual machine supporting a close 1080p resolution. I personally find 1280 x 960 pixels to be a comfortable resolution for Windows 98 but many software items from the era begin to look odd at any resolution above 1024 x 768 (for widescreen) or 1280 x 1024 (for standard aspect ratio). You’ll probably find yourself changing the resolution inside Windows 98 up and down depending on what you may be doing.
The World of DOS
Windows 98 was one of the last operating systems by Microsoft that was built on top of a DOS base layer. This meant that it has fantastic backwards compatiblity with software developed for earlier operating systems (Windows 95, Windows 3.x or straight up DOS) that was later lost with operating systems built upon the NT architecture.
I have had mixed results running DOS software, namely games, inside a VMware virtual machine. Simple DOS applications run OK but anything more demanding (such as games) can have performance, input or sound issues. Although I may one day investigate more as to why, my main suggestion is that if you’re just wanting to get in a few plays of Might and Magic IV then I highly suggest using DOSBox instead.